I have shared some of our kitchen remodel with friends, but I wanted to make a blog post about the details. You never know who you may help. I did quite a bit of research and reading before venturing into our kitchen remodel project. So, grab a drink and let me take you through our kitchen remodel.
Flash back about two years ago, we moved into a new beautiful home. It was empty when we bought it, so I envisioned fresh walls and space to make into our home. Then we moved in and I felt it was dark colored and needed some light. Don’t get me wrong, I like our home. I started planning small DIY projects to update and change some features. This is a classic 2000-ish golden oak, brass fixture home.
One of my first projects was painting light fixtures and fireplace hardware oil rubbed bronze. Just some easy spray paint. I painted other light fixtures brushed nickel, this made them match the bathroom faucets. Not bad.
Let’s jump forward to the kitchen. I knew I wanted the cabinets to be a beige/cream color. Our upstairs has some beige trim, so I decided to make it the same color. Knowing, one day these will meet in the middle. After looking at all types of color palettes, I had my ideas lined out. I did want to keep a little “rustic” look, instead of jumping into contemporary. So, beige cabinets, oil rubbed bronze handles, some type of granite counters that mixed beige and grey. I had no idea there are some many different colors of beige, grey, even oil rubbed bronze (some look black). But I got everything lined out to start.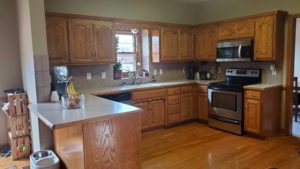
First step was the cabinets. This was a little overwhelming to gulp down, there is wood everywhere. But I decided to do the kitchen and stop there, we can get to other rooms next. Here are the steps I followed for painting the cabinets.
Remove doors and hardware
Use dish soap/water mixture to clean cabinets
Degloss all cabinets and doors (Deglosser)
Lightly sand imperfections. Mainly by silverware drawer and junk drawer
Prime x 2 coats (wait 24 hours between coats) Sherwin Williams ProBlock Oil Based Primer
Paint x 2 coats (wait 24 hours between coats) Sherwin Williams ProMar 200 Semi Gloss Medici Ivory color
Tips: Wear a respirator! 
Doors: I took the cabinet doors in the basement (can open window, use fan for ventilation). Set them on old paint cans and boxes. I used a small roller and had a small brush for some spots.
Cabinets: I ended up doing all the cabinets at once. I used our couch and chair to block off the kitchen, we have three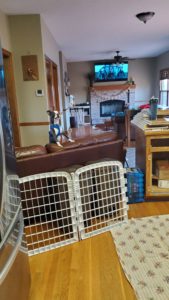 dogs. I didn’t want a painted dog. Also, I did most of the painting in the evening. So, no one would be in the kitchen around the fumes and touching things. Then it was dry by morning. Also, kept it blocked off so my dogs wouldn’t get dirt on fresh paint.
Since I did my doors before my cabinets (long story, someone procrastinated in removing some wood trim above the window), I installed the hardware. I waited three days after the last coat of paint to put on handles. They looked great! Also, I realized my hinges were Double Demountable Cabinet Hinges, at $7.50 a piece (not a pair), I decided to paint these too. I used Rust oleum oil rubbed bronze spray paint. About 3 coats each side. Then a spray enamel to seal the paint on.
Apparently in 2000-ish these little wood scallops were popular, but I saw this as an opportunity to remove them. So, we opened the window area and updated the light fixture. It really opened the whole area. Good call on this one! The bottom scallop was a little harder to remove. So, I agreed to leave it, paint it, WITH the understanding it will come out SOON.
When I started painting the cabinets, my goal was to have the paint done before the counter tops were installed. I came in by the skin of my teeth. I finished the last coat the night before the install. This may not be right, but it’s what I did. And, I made my goal (I’m a goal person). I had looked at a couple counter top stores. There are many options and colors and designs. I decided on Gnanach granite, bull nose edge, from Midland Marble and Granite. They are a great local company to work with! It mixes beige, brown, and grey, while having some large veins. So, we have the countertop picked, decided on a Blanco sink in Biscuit color. The new sinks come in many sizes and shapes. It was a weird thought to do one big sink, not a 50/50 split, but now I love it. It’s huge and you can fit a full cookie sheet, and more! Our install was great! The granite fit in perfect and matches the cabinets. Oh, they added in a small piece of granite for our window. I knew it was going to be close to fit this on our slab, but it showed up. This is a great addition!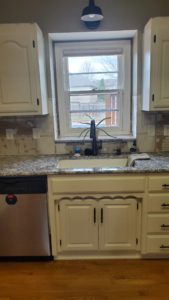
Now that we had cabinets, counter tops, and sink, we move on to sink hardware. I had someone recommend a touch sink. So, I did some research. It comes on when you touch any part of the faucet or handle. Not a touch less, they didn’t have the best reviews. So, we decided to go for it. I couldn’t find one local, but I did find a Delta Essa Single-Handle Touch Kitchen Sink Faucet. The touch feature is good if you have chicken or egg goo on your hands, you can turn it on by touching your forearm to the faucet. Also, it has a blue/red light for water temperature. It didn’t have a matching soap dispenser, but I found one online. So far, so good.
After a few days, I was ready to put the cabinet doors back on. I brought them up from the basement (handles 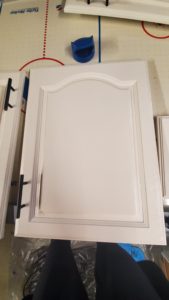
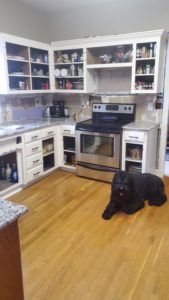 already on) and put them back on. Now since I painted the hinges, I did not know which ones went to which door. But I did my best. This is some hard work lining up the doors, so they are even and close exactly right. I had to loosen and tighten, rearrange the hinges. Our pantry still catches when it closes, but I will get it. Also, I put a little canola oil on the hinges or drawer wheels to make sure they rolled a little better. Some paint caused some stickiness. This step really brought the kitchen to life. The brightness of the cabinets brightened up the room. I think my wall paint looks a lighter color in the kitchen, even though I didn’t change the wall paint. The room looks so bright and fresh!
My next step was drawing in some more rustic finishes with some AirStone on the bar. I read some blogs about how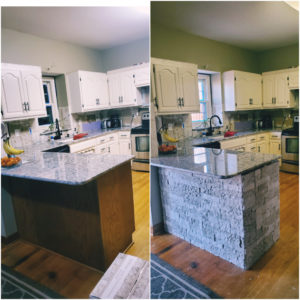 easy it was to install and saw how it changed the look of a bar. So, I went for it. You can get it at Lowe’s (only place I found it). It comes in three colors, I went with Birch Bluff. All three looked good, but this was the lightest color combo (mix of beige, grey, white). I picked up 2 boxes of rocks, 1 box edge/corners, 1-gallon adhesive. There are many tips on the AirStone website and video tutorials. One tip was to lay out your layers before your start, and work bottom up. So, I opened it up and got started. It was easy, just took time. The hardest part was cutting the rocks. They cut easily, but I got tired of this step near the end. This project took me 4 hours. Pretty much nonstop on a Saturday morning. When I look at the before and after of this step, it is a big change. One of the most drastic changes. I am glad I decided to do this upgrade.
Now, in the middle of my remodel, Covid-19 happened. We were put on a Stay Home order. But I had all these supplies. So, it gave me something to do. The back splash was the only missing piece. I wanted to wait to see how everything looked before I picked out the back splash tile. My husband did the back splash tile, old counter top demo before our granite counter top install. Then fixed the drywall patches.
I was torn between a light grey and beige tile. Long or short in size. But I decided on a 3×12 Subway Tile. I found it on Wayfair, since our local tile stores did not have showrooms open at this time. So, I ordered it in. I’ll update when the back splash is completed. We will wait for the big reveal!
Looking back at this project, it was a lot of work. Time and labor. But, I’m happy with the results and how it updated my house. I love to sit at the stone bar, drink a coffee, knowing I created this kitchen look.
Happy renovations and updates!
Molly Wichman
